
How to lay vinyl flooring: a complete installation guide
Are you thinking about quickly, cleanly, and affordably renovating the flooring of your project? Click-type vinyl flooring is one of the most practical and aesthetic solutions for renovating any space without complicated construction work. Durable, easy to maintain, and with quick and clean installation, this flooring has become the ideal option for both homes and commercial spaces.
In this complete guide, you will discover everything you need to know to correctly install vinyl flooring: from surface preparation to final touches. Get ready to transform your spaces with a professional result!
Why choose vinyl flooring for your home or project?
Click-type vinyl flooring has become one of the most popular options in interior design and renovations thanks to its perfect combination of aesthetics, functionality, and ease of installation. Whether you are renovating a home or working on a commercial project, here are some reasons why this type of flooring is worth choosing:
- Quick and clean installation. Thanks to its click locking system, it requires no adhesives or special tools. This allows you to install the vinyl flooring directly over the existing floor, without construction work or debris, reducing time and costs.
- Water and moisture resistant. Ideal for kitchens, bathrooms, or damp areas, such as our SPC Click&Floor vinyl flooring, which is 100% water resistant, making it a safe and durable solution for any room in the home.
- Easy maintenance. It can be cleaned with water and neutral products, without special treatments. Moreover, its resistant surface prevents the accumulation of dust, bacteria, or mites, making it perfect for homes with children or allergy sufferers.
- Variety of designs. Vinyl flooring offers a wide range of finishes and colors that imitate wood, with realistic textures and warm tones that suit any decorative style.
- Comfort and insulation. Thanks to its multi-layer structure, it provides a warm and comfortable feel underfoot, unlike colder floors such as ceramic. It also offers good acoustic insulation, making it an ideal solution for quick renovations.
- Hassle-free renovation. Its thin profile allows it to be installed without the need to modify doors or baseboards, making it perfect for quick refurbishments.
Benefits of vinyl flooring: durability and resistance
One of the main reasons why many people choose vinyl flooring is its outstanding durability and resistance. This type of flooring is made from high-quality materials that allow it to withstand daily wear and tear without losing its aesthetic appeal or functionality.
Vinyl flooring is particularly resistant to impacts, scratches, and stains, making it an ideal option for high-traffic areas such as living rooms, kitchens, or even offices. Moreover, its waterproof composition makes it resistant to moisture and splashes, preventing common problems found in other types of coverings like warping or mold growth.
Thanks to these properties, installing vinyl flooring ensures a long-lasting surface that maintains its pristine appearance for years, while requiring only simple and economical maintenance. So if you are looking for a practical and resilient solution to renovate your floors, vinyl flooring is undoubtedly one of the best options on the market.
Advantages of vinyl flooring compared to other floorings
When renovating the floor of a home or commercial space, it is common to compare different options such as ceramic, parquet, laminate, or carpet. However, SPC vinyl flooring has become one of the most practical and versatile alternatives. Here’s why installing vinyl flooring is a smart decision compared to other types of flooring.
One of its main advantages is the ease of installation. If you’re wondering how to install vinyl flooring, you should know it does not require complicated construction work or special tools. In the case of click vinyl flooring, like our Click&Floor, the adhesive-free click system allows for a quick, clean installation without prior experience, ideal for those who want to do it themselves.
Moreover, vinyl flooring is more affordable than many traditional materials, without compromising on aesthetics or comfort. It comes in a wide variety of finishes, with realistic textures that are pleasant to the touch. It also offers greater moisture resistance compared to laminate floors, making it a better option for kitchens, bathrooms, and basements. Finally, its easy maintenance and ability to provide thermal and acoustic insulation make it stand out from colder or noisier options such as stoneware or marble.
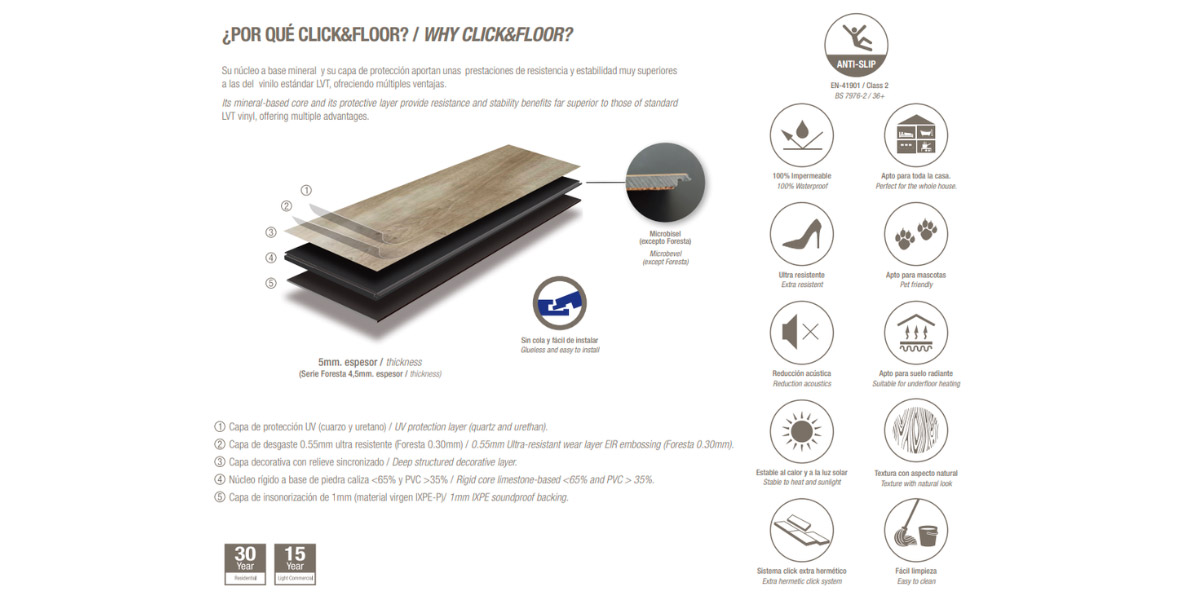
In short, if you are considering how to install vinyl flooring in your home, here are the main advantages and features of our high-resistance SPC floor Click&Floor:
Preparations before installing laminate vinyl flooring
Before starting the installation, it is essential to properly prepare the surface and the surroundings. Following these steps will help you achieve a professional finish and greater durability when laying vinyl flooring.
1.- Check the surface. The first step to correctly installing vinyl flooring is to make sure that the subfloor is clean, dry, firm, and level. Whether glued or click type, vinyl flooring requires a smooth base to avoid visible imperfections or fitting problems. If there are uneven areas or irregularities, it is advisable to apply a leveling compound before starting.
2.- Cleaning and drying. Before laying vinyl flooring, remove all dirt, dust, and grease residues. If the floor is damp or freshly poured (in the case of cement screeds), wait until it is completely dry to prevent future damage.
3.- Acclimate the material. A step many overlook when learning how to install vinyl flooring is acclimating the material. Leave the unopened packages of planks or tiles in the room where they will be installed for at least 24-48 hours. This allows the flooring to adjust to the temperature and humidity of the environment, avoiding later expansion or contraction.¡
4.- Plan the installation. Before starting to lay click vinyl flooring, sketch out how you will arrange the pieces. This will help you avoid unnecessary cuts and achieve a more harmonious appearance. It is also wise to carefully measure the room to know where to start, usually from a straight and visible wall.
With these preparations, you will be ready to confidently start installing vinyl flooring and achieve a durable, aesthetic result. Remember that good preparation is key to making the installation process easier and more efficient.
Is it necessary to prepare the subfloor?
Yes, preparing the subfloor is an essential step before installing vinyl flooring, as it will largely determine the durability and final finish of the installation. A poorly prepared subfloor can lead to problems such as noise, visible irregularities, or even premature deterioration of the vinyl.
Before worrying about how to install vinyl flooring, make sure that the base surface meets these conditions:
- Level and firm. The subfloor must be completely level. Any unevenness, cracks, or irregularities may become noticeable once the vinyl is installed, especially if it is a thin or flexible model. For very uneven floors, it is recommended to apply a layer of leveling compound to ensure a flat base.
- Clean and dry. Before laying vinyl flooring, remove all debris, dust, or grease from the subfloor. It is also crucial that it is completely dry. Vinyl is resistant to moisture, but if water comes from below, it can cause problems over time, especially in the case of click vinyl installations that do not use adhesive and can be affected by condensation.
- Compatible with other floorings. Vinyl can be installed over different types of surfaces: concrete, ceramic, wood, or even old laminate floors, as long as they are in good condition. However, if there is carpet, it is recommended to remove it before proceeding.
- Use of underlayment (optional). When installing click vinyl flooring, it is often advised to place an insulating underlay beneath, especially if it is not already integrated. This helps improve acoustic and thermal insulation and makes installation easier.
In summary, properly preparing the subfloor is fundamental to ensuring that the process of installing vinyl flooring is successful. A good start guarantees a more durable, comfortable, and aesthetically perfect floor.
Measuring and cutting vinyl floor planks
One of the most important steps when installing vinyl flooring is making precise cuts. Accurate measurements ensure a perfect fit, especially along edges, corners, door frames, or columns. Here’s how to measure and cut vinyl floor planks correctly to achieve a clean, professional finish.
1.- Take precise measurements. Before cutting any plank, use a measuring tape to measure the exact space where it will be placed. Always mark on the back of the plank to avoid damaging the visible surface. If installing click vinyl flooring, also account for the locking system in your calculations, as some pieces may require extra space to fit properly.
2.- Draw the cutting line. Using a metal ruler and pencil, mark a straight line on the back of the vinyl plank according to the measured length. If the cut is L-shaped or angled, you can use a square or a cardboard template to replicate the exact shape.
3.- Cut with a utility knife. For our vinyl flooring, no power tools are needed. Simply run a sharp utility knife along the cutting line several times to score the material well. Then, firmly bend the piece so it snaps cleanly.
4.- Make special cuts if needed. In tricky areas, like around door frames, columns, or pipes, you can use a jigsaw with a PVC blade, heavy-duty scissors, or a finer utility knife for greater precision. Always test the piece before permanently fitting it, especially with click vinyl flooring, as it needs to lock correctly with the adjoining planks.
5.- Fit carefully. Once cut, test the plank in place without fixing it. Ensure it fits well and respects the expansion gap at the edges. Adjust as needed to achieve a perfect fit.
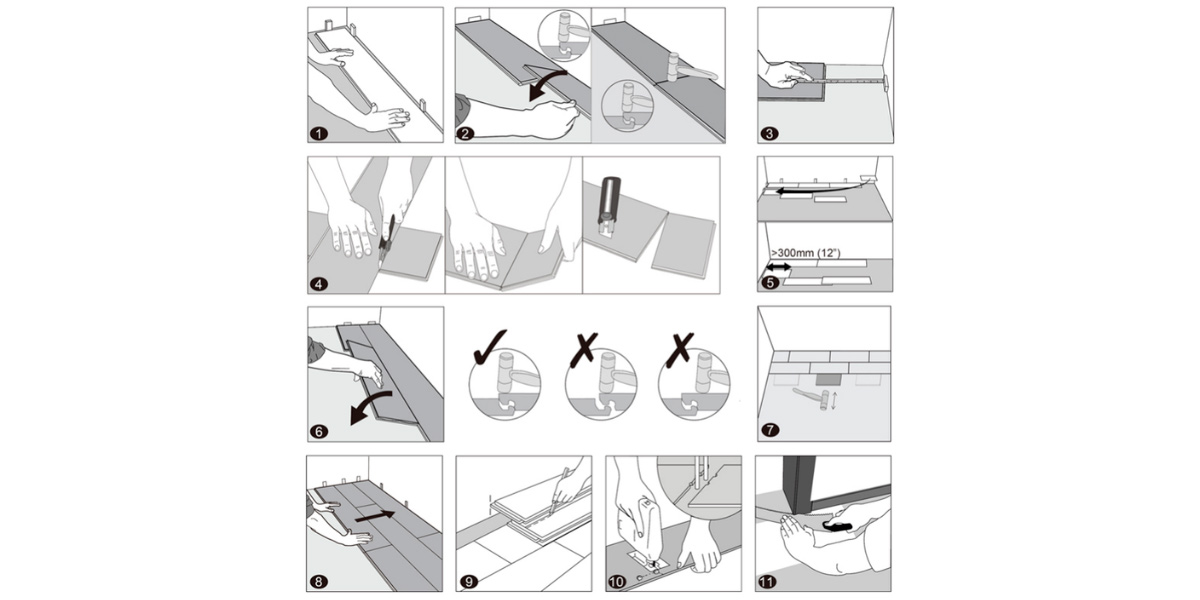
Knowing how to install vinyl flooring correctly also means mastering cutting techniques. With patience, precision, and the right tools, you can adapt each vinyl plank to your space and achieve a flawless finish throughout the installation.
In addition to this video, you can also see the steps to follow in any of our product data sheets, and we’ve included the most important images here for you:
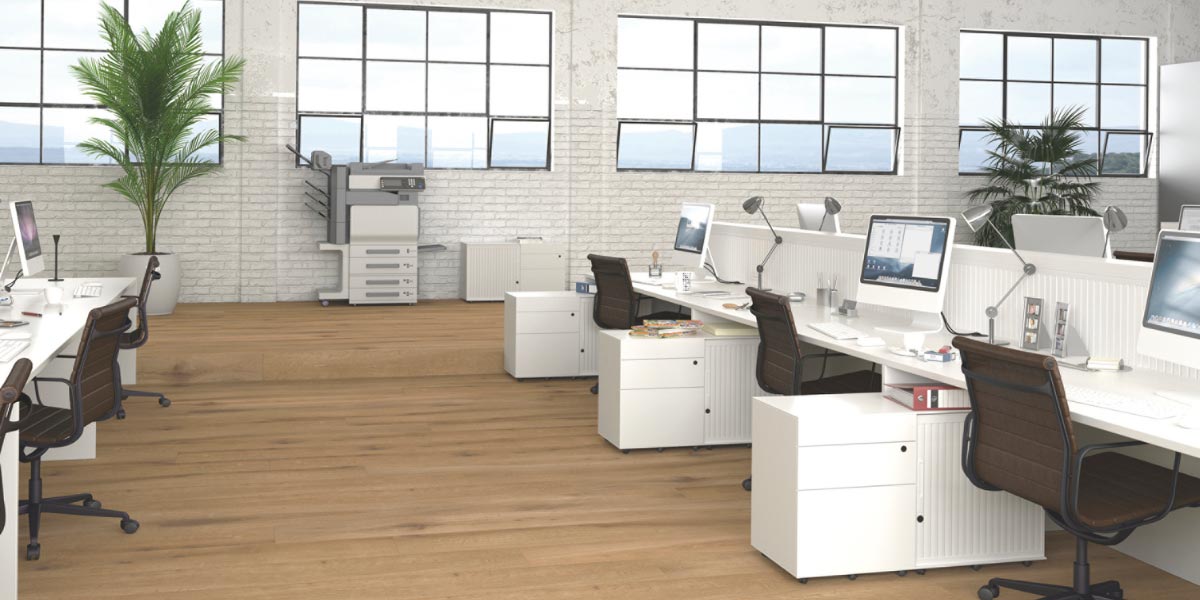
Using vinyl flooring in your projects
SPC vinyl flooring has established itself as one of the most versatile and sought-after solutions in the world of design and construction. Its advanced composition gives it exceptional resistance to impacts, moisture, and wear. This makes it the perfect ally not only for homes, but also for commercial spaces that require durable, low-maintenance surfaces.
Moreover, thanks to its wide range of designs and finishes, SPC vinyl flooring can realistically imitate wood, offering endless aesthetic possibilities to personalize each project. Its simple installation using a click system, without adhesives, allows any room to be transformed in record time, optimizing construction schedules and reducing costs.
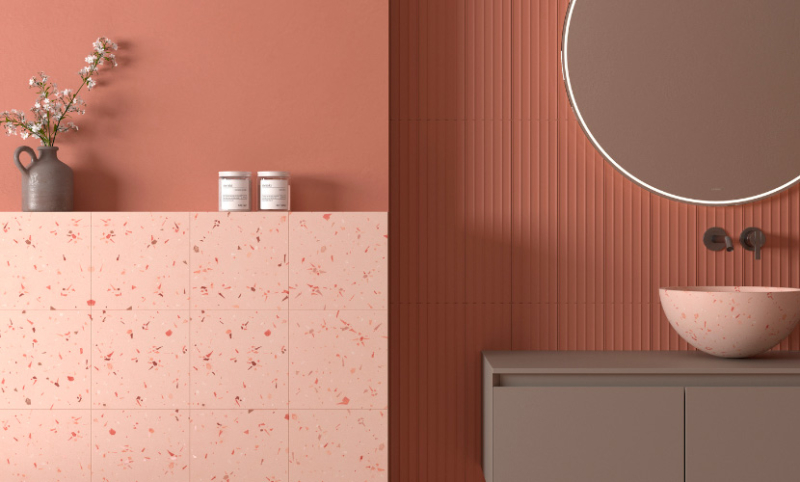
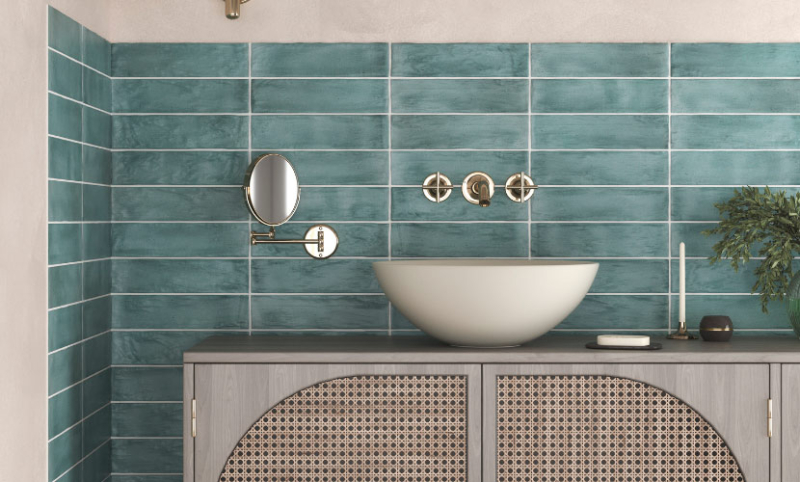
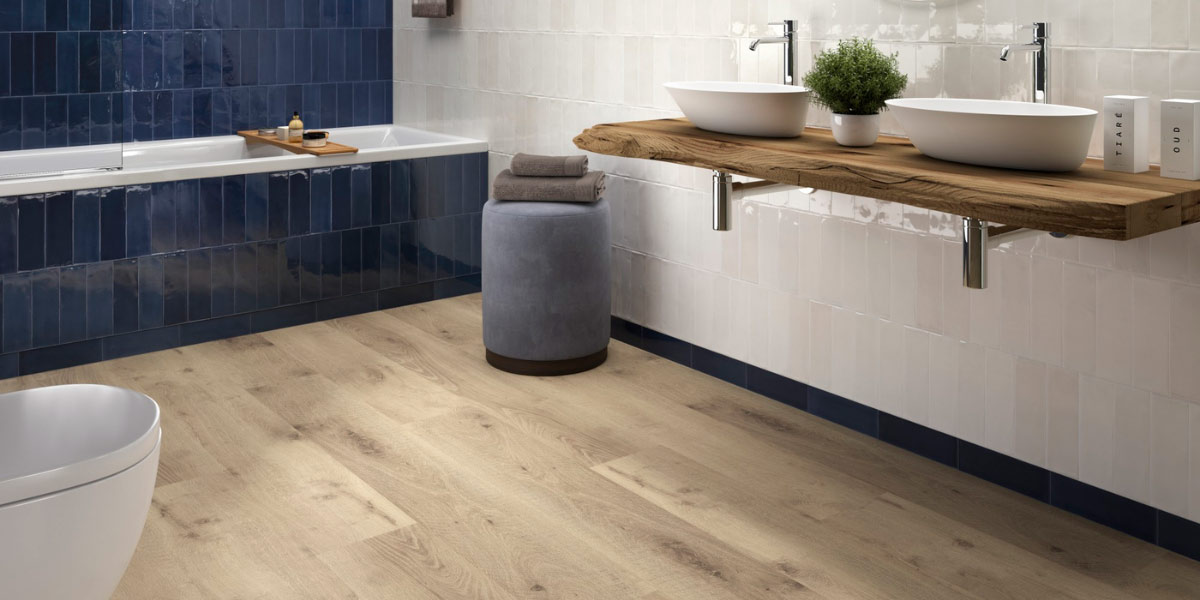
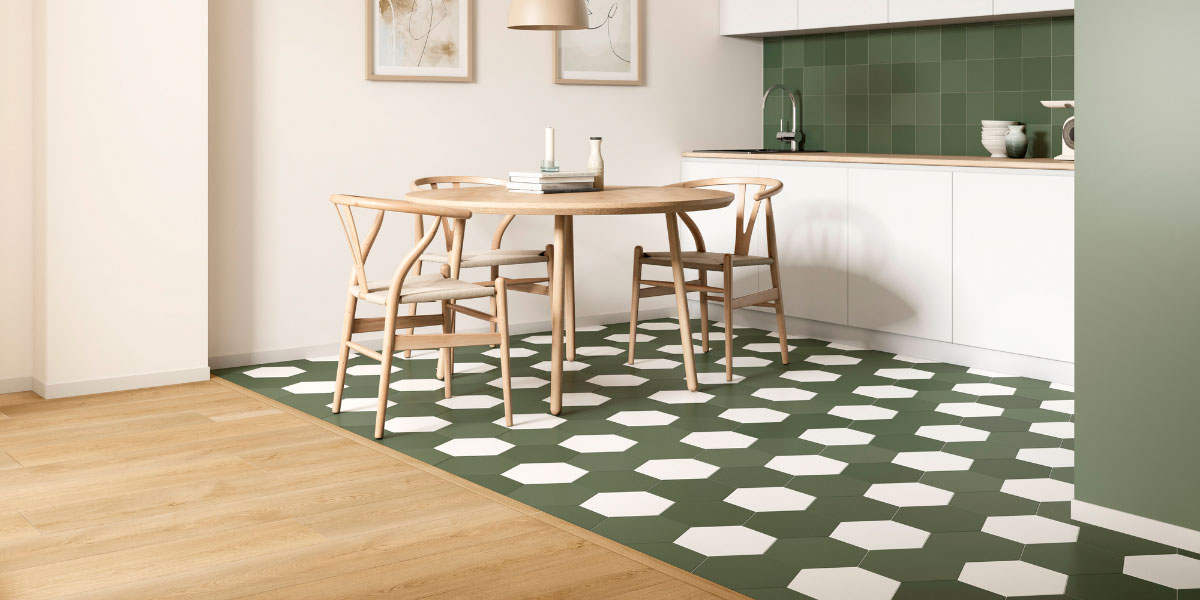
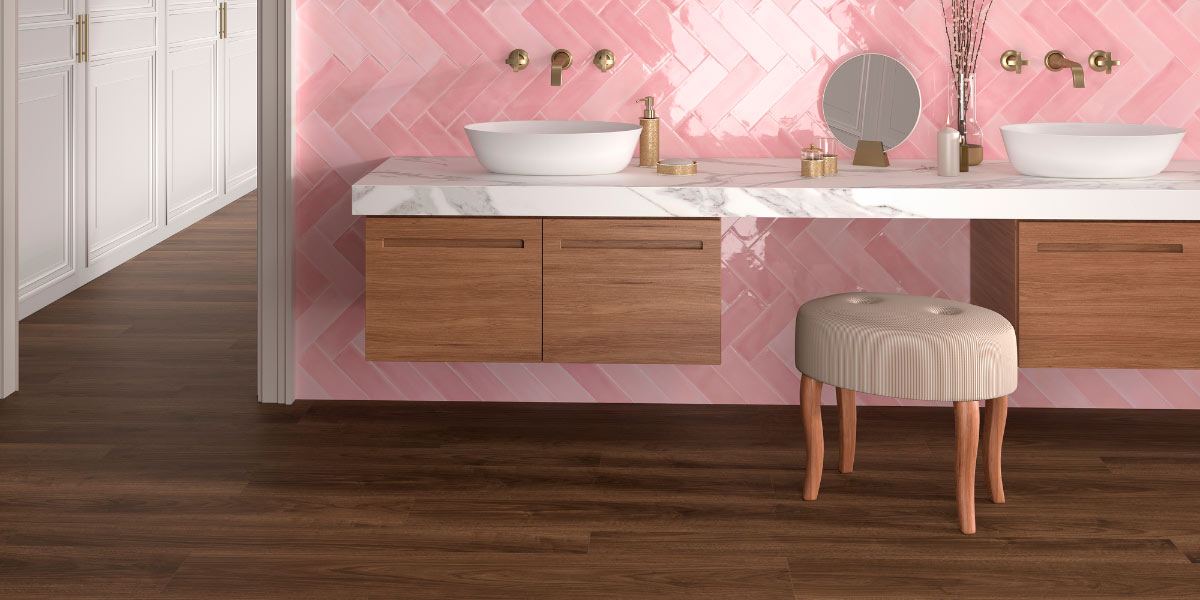
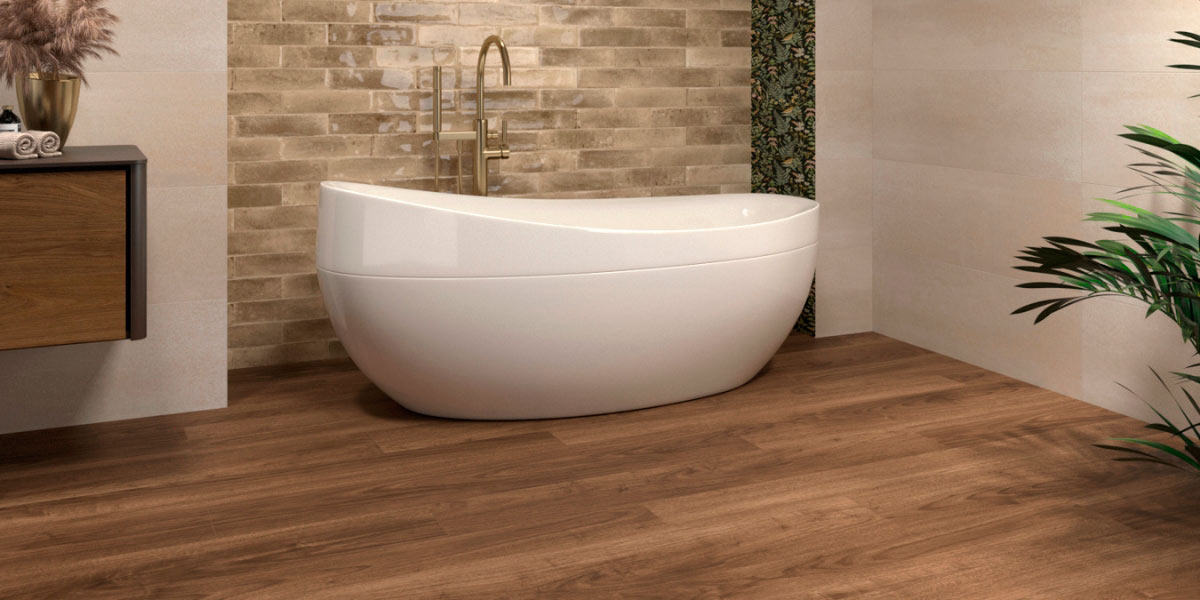
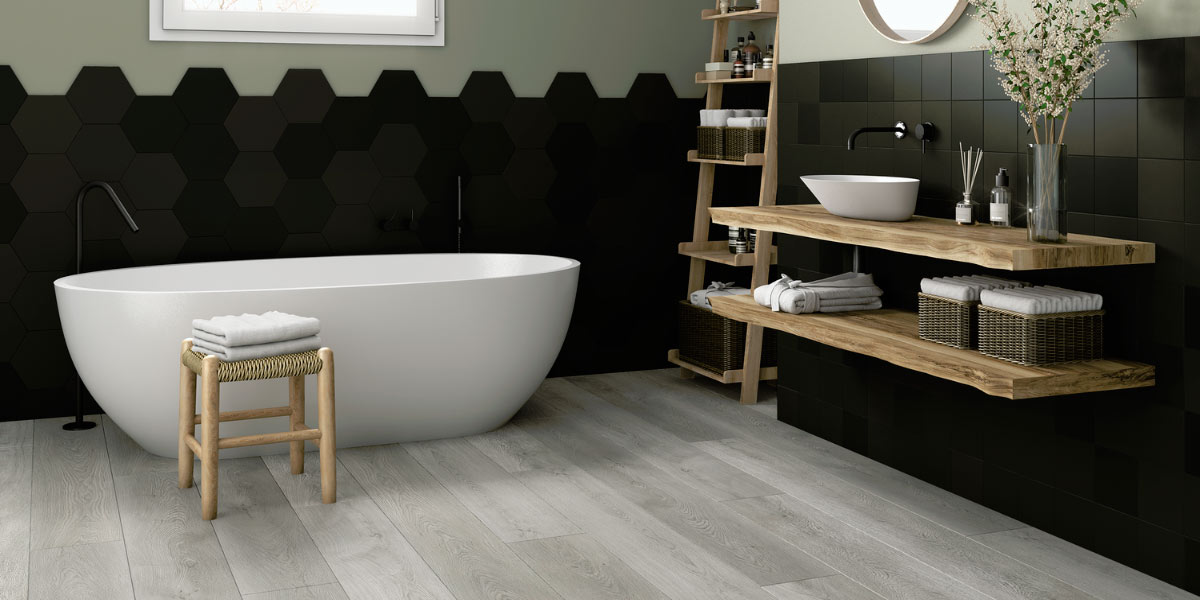
Click vinyl flooring in the bathroom: benefits and how to combine it
The bathroom is one of the places where the resistance and waterproof nature of SPC vinyl flooring are most appreciated. Thanks to its 100% waterproof composition, it is perfect for humid environments, as it does not warp or swell with water, unlike other materials:
- Total resistance to moisture, preventing mold or leakage problems.
- Warm, pleasant surface to the touch, ideal for walking barefoot.
- Greater safety: many models have anti-slip treatments.
One of the major trends is to use wood-effect vinyl flooring to bring warmth, contrasting with ceramic or porcelain tiles on the walls that reflect light and visually enlarge the space. The result is a balanced, cozy bathroom that is also very easy to maintain. Here we show you some examples of how to combine this type of floor with tiles:
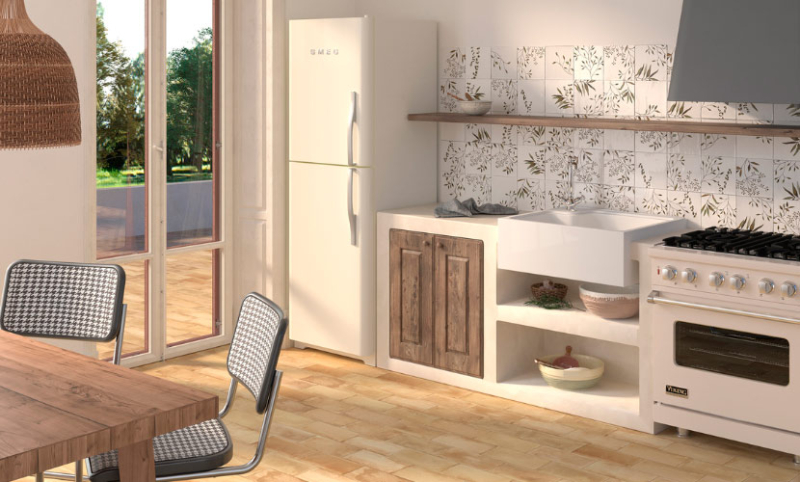
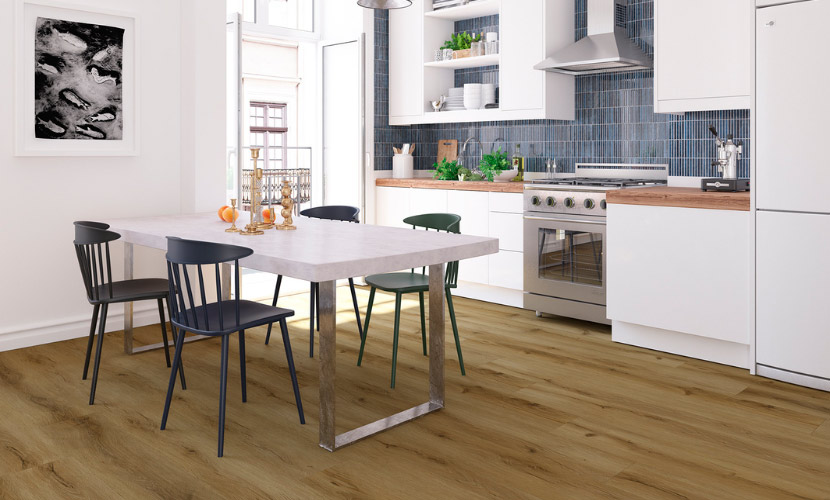
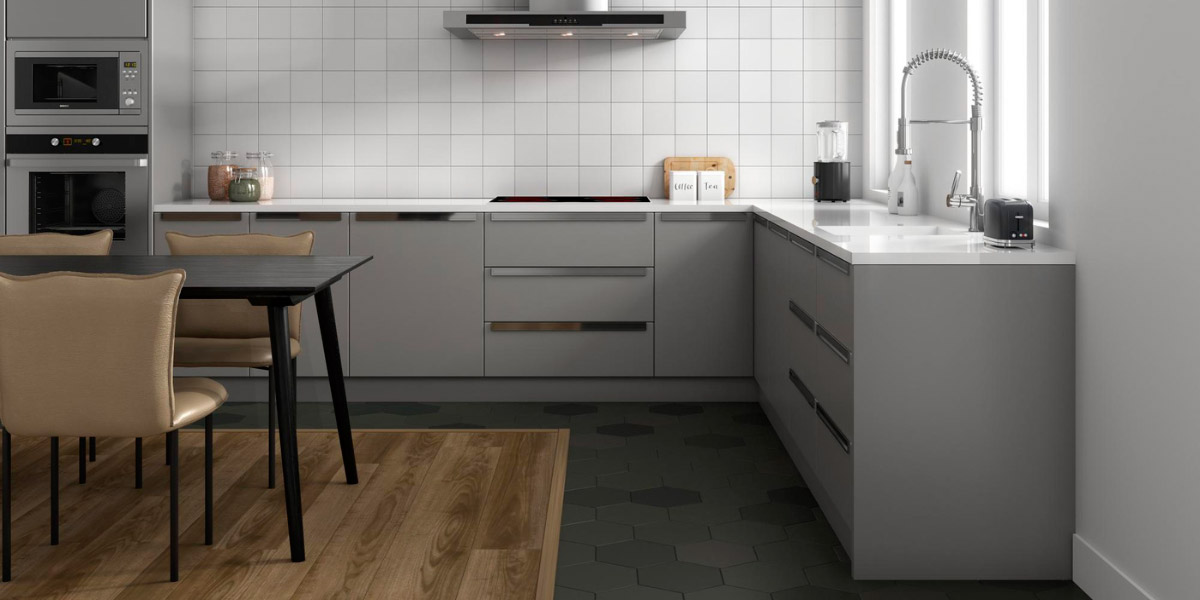
Click vinyl flooring in the kitchen: benefits and design keys
The kitchen is a high-traffic area with a constant risk of water, oil, and food splashes. SPC vinyl flooring stands out from other options due to its resistance to stains and scratches, and it is very easy to clean with a slightly damp mop.
- Withstands daily wear without losing its appearance.
- Does not absorb odors or stains, which is essential in a space where cooking happens constantly.
- Absorbs slight subfloor irregularities, making it easier to renovate without costly construction work.
You can create stunning kitchens by playing with contrasts: for example, an oak or walnut-effect vinyl floor that brings a natural touch, combined with colorful hydraulic ceramic tiles on the wall for added vibrancy. If you prefer an industrial look, a gray cement-effect vinyl floor alongside black or white subway tiles creates a modern, timeless atmosphere.

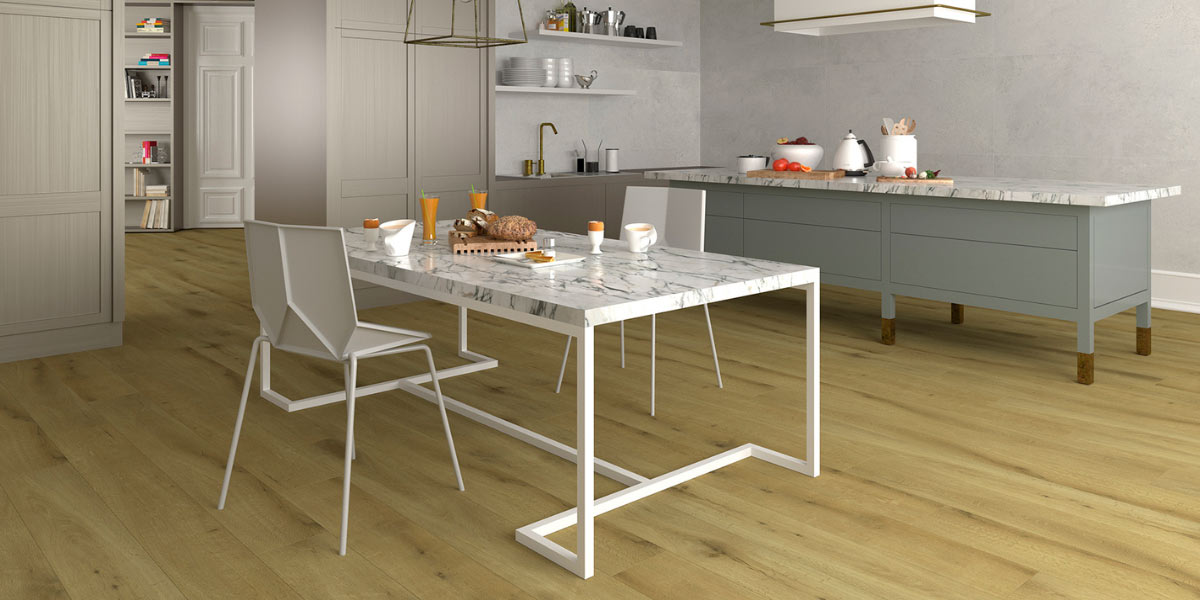
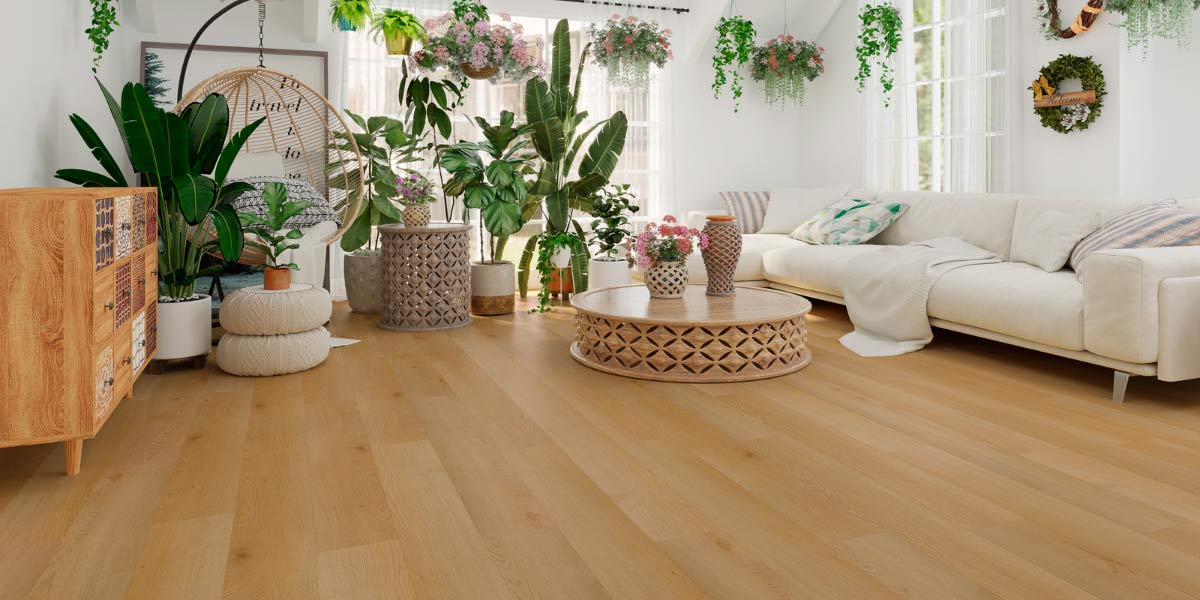
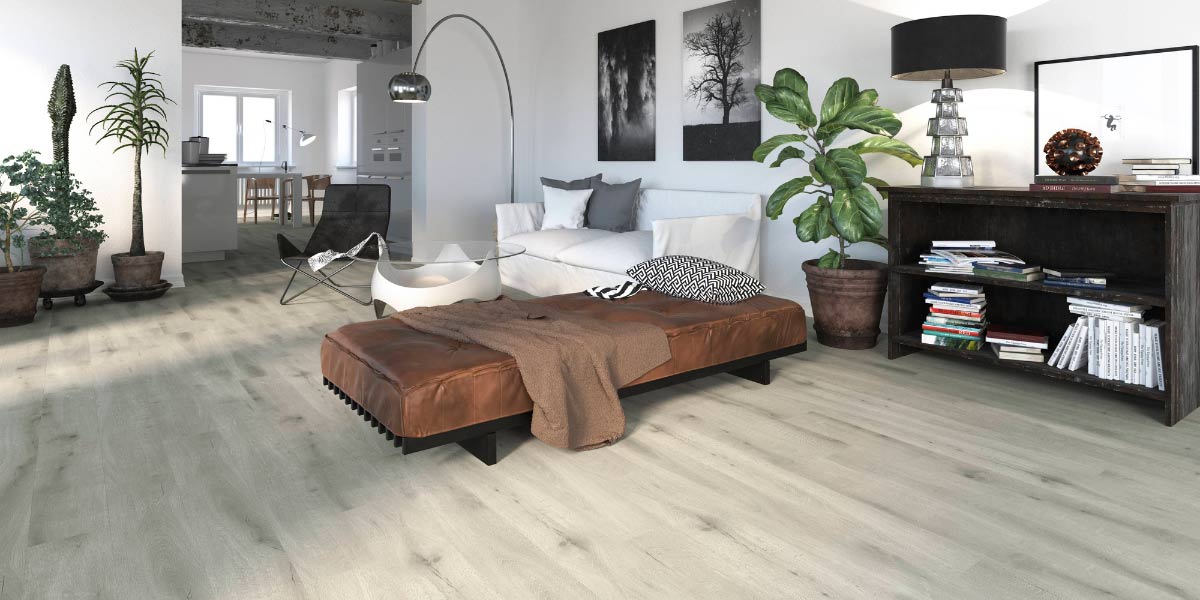
SPC vinyl flooring in living rooms: warmth, design, and practicality
The living room is the heart of the home—a place for gathering, relaxing, and sharing life where comfort and aesthetics are essential. Installing SPC vinyl flooring in this space not only adds beauty, but also brings a series of technical advantages that make it an excellent choice over other types of flooring.
- Natural appearance. Today’s SPC vinyl designs realistically replicate fine woods such as oak, walnut, or ash, creating a warm and elegant atmosphere.
- Acoustic and thermal comfort. Thanks to its multi-layer structure, it reduces footstep noise and offers a pleasantly tempered feel underfoot, perfect for areas where people walk barefoot or children play.
- Durability and easy cleaning. Ideal for everyday life, it easily withstands frequent foot traffic and stays spotless with simple cleaning.
SPC vinyl flooring looks especially stunning in spacious living rooms with large windows, enhancing natural light and providing visual continuity if extended into hallways or dining areas. To emphasize its prominence, you can choose smooth walls in neutral tones or include decorative ceramic coverings in specific spots, such as behind the sofa or around the fireplace, to create an attractive textured contrast.

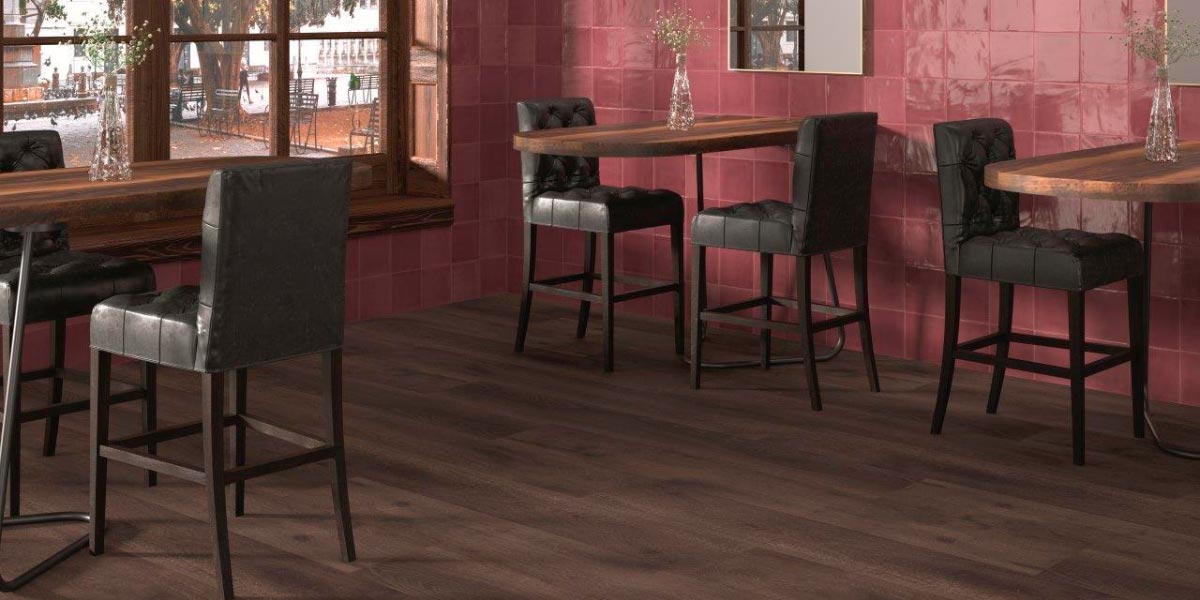
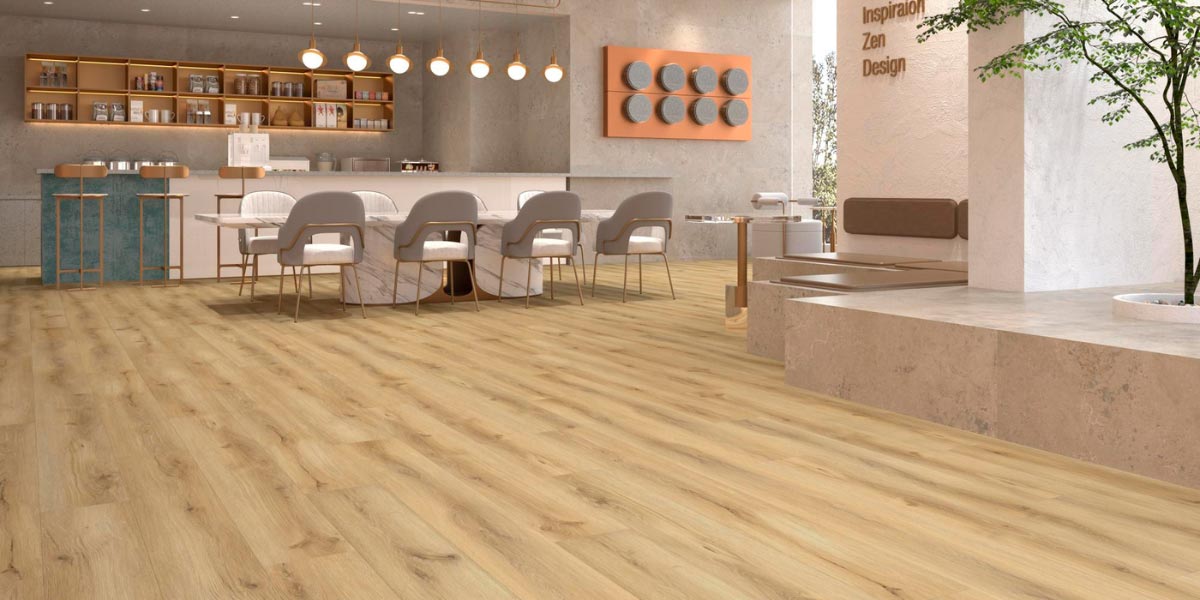
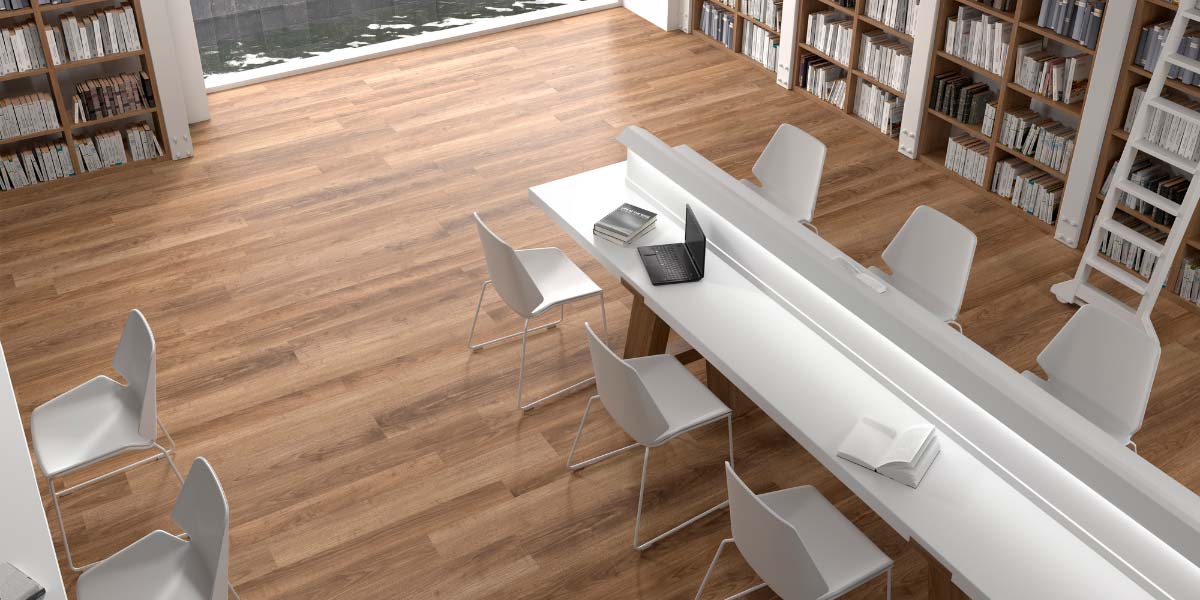
Vinyl flooring for other types of projects: restaurants, shops, and more
SPC vinyl flooring is not limited to the home. It is an increasingly popular solution in commercial spaces such as restaurants, shops, hotels, or exhibition halls.
- Heavy traffic. Thanks to its durable wear layer, it withstands continuous foot traffic without losing its original appearance, remaining free from scratches and dents.
- Minimal maintenance. It is easy to clean with just a slightly damp mop, which reduces maintenance costs for businesses.
- Quick installation. It allows a venue to be renovated in a very short time, avoiding long closure periods.
- Customized design. With finishes that imitate fine woods or natural stones, you can create exclusive spaces tailored to your brand’s identity.
For these reasons, architects and interior designers recommend it for venues where aesthetics, durability, and ease of cleaning are top priorities.


Final tips for the correct installation of high-resistance SPC flooring
- Before installation, inspect the material in daylight to check for any visible damage, including defects or differences in color or gloss.
- It is best to lay the planks perpendicular to the window, following the direction of the main light source. For the best result, always work with 3 or 4 boxes at the same time, mixing the planks during installation.
- Calculate the room’s surface area before installation and plan for 5-10% extra flooring to account for cutting waste.
- The flooring should only be installed in temperature-controlled spaces.
- For surfaces exceeding 400 m², lengths greater than 20 m, or transitions between the vinyl floor and another material, it is recommended to use T-molding profiles while respecting the expansion gap.
Installing vinyl flooring is an excellent choice if you want to renovate your spaces with a durable, decorative, and easy-to-install floor. As you’ve seen in this guide, learning how to install vinyl flooring doesn’t require advanced knowledge—just good planning, the right tools, and following the steps properly.
Properly preparing the subfloor, measuring precisely, and taking care of the finishing touches are key to achieving a long-lasting, professional result. Whether you do it yourself or get some help, vinyl flooring is a practical, modern, and aesthetic solution that will transform any room in your home. If you need inspiration to choose an SPC floor, we recommend taking a look at our Click&Floor catalog, which offers a wide variety of models, finishes, and colors. Ready to start your project? Let’s get to work!